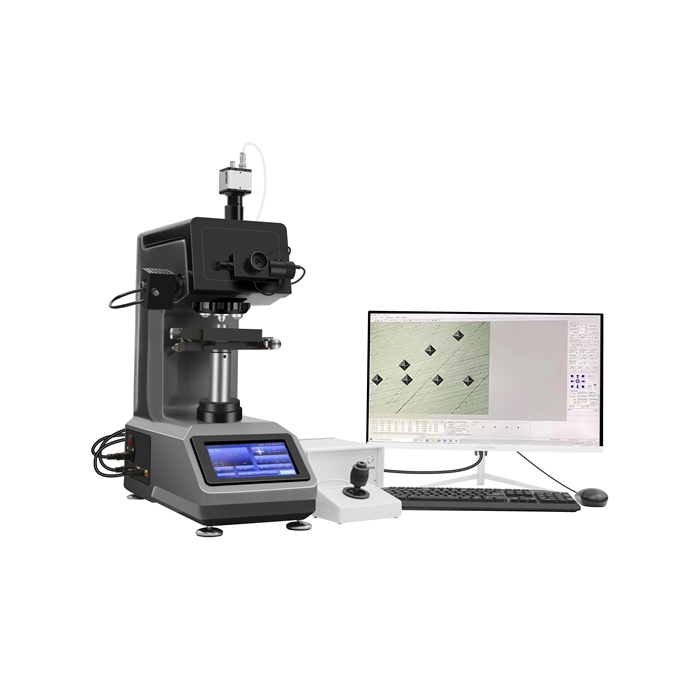
7MHXZD-1000A Fully Automatic Micro Hardness Tester
1、Applicable scope of hardness tester: It is mainly used to measure small, thin specimens and brittle hardware. It can be used for various metals (ferrous metals, non-ferrous metals, castings, alloy materials, etc.), metal structures, metal surface processing layers, Carburized layer, hardened layer (oxidized, various infiltrated layers, coated layers), heat-treated specimens, carbonized specimens, quenched specimens, tiny parts of phase inclusions, glass, agate, artificial gems, ceramics and other brittle and hard non-metals Material testing, precise positioning of multi-point measurement in the fine part, deep test and analysis of indentation, test and analysis of infiltration coating, test of hardness gradient, etc., observation and study of metallographic structure, measurement and measurement of coating thickness Analysis etc.
2、 The host uses optical-mechanical-electrical integration technology, one-key operation, efficient and fast; adopts C language programming, dual-core dual-channel control system, and LCD computer operation panel.
3、Automatic turret structure, vertical loading mechanism, high-precision lifting mechanism, and encoder directly collect data, which can realize dual display of any hardness unit.
4、Realize the connection of computer image processing system, eyepiece and CCD photography to watch and test at the same time, equipped with large-capacity storage system, micro-printer, more suitable for batch sample detection. The image processing system adopts a high-precision CCD image imaging system and a computer image acquisition processor to convert the indentation images collected in the instrument into the hardness measurement software processing center, and is equipped with a hardness measurement analysis system.
5、Accuracy conforms to GB/T4340.2 ISO6507-2 and American ASTME384.
Technical Parameters:
Main equipment configuration:
Test force
10gf (0.098N)、25gf (0.245N)、50gf (0.49N)、100gf (0.98N)、 200gf (1.96N)、300gf (2.94N)、500gf(4.9N)、1kgf (9.8N)
Scale
HV0.01、HV0.025、HV0.05、HV0.1、HV0.2、HV0.3、HV0.5、HV1
Data input mode
Automaticlly
Measurement
HV(HK optical)
Turret method
Automatic turret
Measurement mode
Fully automatic and manual, automatic focus
Display mode
7 inch LCD touch screen digital display, computer display
Focus objective
10X/40X
Total magnification
100X 400X
Electric X-Y-Z automatic platform
One set is convenient for single-point and multi-point automatic testing. Manual, automatic focus, measurement
Dwell time
1~60S
Loading method
Automatic completion of adding, protecting and unloading tests
Test storage times
10pcs per group,500 groups
Smallest moving unit
0.015625μm
Max. size of test piece
Max. Height 90mm ,throat depth 110mm
Main functions of the software
System linkage, pressure linkage, loading linkage, image acquisition, automatic measurement, automatic point-finding, diagonal measurement, four-point measurement, hardness conversion, graphic report, result statistics
Dimensions
320*500*570mm
Weight
60KG
Executive standard
GB/T4340.2 National Standard (GB/T4340.2 Chinese Standard),
JJG151 Inspection Rule (JJG151 Inspection Rule)
Name
Quantity
Host (including one microscopic Vickers indenter, one 10× and one 40× objective lens);
1 set
Test bench, copper weights (6 pieces), microscope accessory box;
1 set
XY test platform (including connecting wire)
1 set
Sheet holding table
1 pc
Flat clamping table
1pc
Accessories
Level adjustment screws 4pcs, screwdrivers 2pcs, level gauges 1pc
Micro Vickers hardness block
2 pcs (HV0.2 and HV1)
Product certificate, product instruction manual
1 sheet ea.
iVision - HV Micro/Vickers hardness automatic measurement system
Main function
1.XYZ sample movement control: The system provides XY electric moving sample stage and Z-axis control; it can be controlled by joystick, software control or manual adjustment; XY can move at the same time; XYZ can be fine-tuned with the keyboard direction keys to be accurate;
2.Camera: 1.3M pixel CMOS USB2.0 camera, other cameras are optional;
3.Loading mode and path setting: The system provides a variety of loading modes including along the line, along the edge angle, along the edge angle of the curve, etc.; the coordinates of the loading point can be set arbitrarily;
4.Automatic edge finding: automatically scan along the edge of the sample to obtain the overall outline of the sample, which is used to set the starting point and direction of the path;
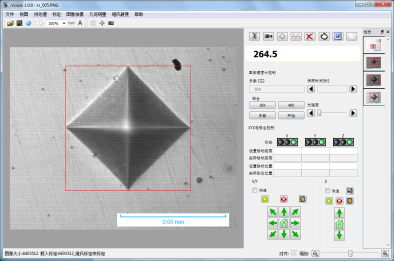
5.Panoramic scan: set the size of the area, the system automatically shifts the scanned image to stitch to obtain the entire image of the area for path setting;
6.Automatic loading, focusing and measurement: The system automatically loads, automatically adjusts the focus and measures automatically according to the set loading mode, and automatically draws the hardening curve; it is completed by one key;
7.Hardness value conversion, correction, and effective verification: The system can simultaneously convert the measured micro Vickers hardness value to other hardness scales such as HB, HR, etc.; it can correct the measured value of the spherical cylindrical sample; Effective verification of the measured value of the sample;
8.Hardening curve, data statistics, automatic alarm: it can automatically detect and draw multiple hardening curves and calculate the depth of hardened layer; automatically calculate the average hardness, variance, Cp, Cpk and other statistical values; automatically mark out the data exceeding the upper and lower limits; Can easily call up the depth template file.
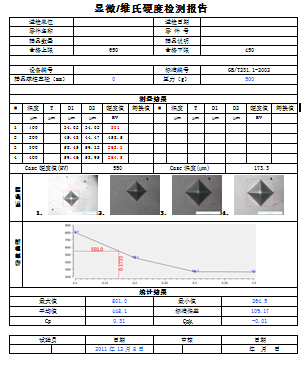
9.Data storage: measurement data and images can be saved in a file for later recall;
10.Test report: Automatically generate WORD, EXCEL or PDF document report; user can customize the report format; standard format includes every single hardness measurement value, statistical value, indentation image, and hardening curve, etc.; users can also enter custom additional Information is used for reporting; test data can also be sent to the designated network port;
11.Data transmission: measurement data can be sent to the network receiving server for connection with the enterprise database;
12.Knoop hardness, fracture toughness: can be set to Knoop hardness measurement; can also be set to indentation measurement method to measure fracture toughness;
Other functions:Contains all the functions of the iVision-PM microscopic image processing and measurement system, including image capture, calibration, image processing, geometric size measurement, document labeling, album management, and fixed magnification.
